Creating a contact form with Jetpack
1. Install and activate Jetpack
To begin, you’ll need to install and activate the Jetpack plugin. To do this, head over to your WordPress dashboard and navigate to Plugins → Add New.
In the search bar, type in “Jetpack” and hit enter. Click Install Now. After the plugin is installed, click Activate.
Lastly, once you’ve activated the plugin, you’ll be prompted to connect it to your WordPress.com account. If you don’t have a WordPress.com account yet, don’t worry — you can create one for free.
2. Create a contact form
Once you have Jetpack installed and activated, creating a contact form is easy. Simply navigate to Pages → Add New in your WordPress dashboard to get started.
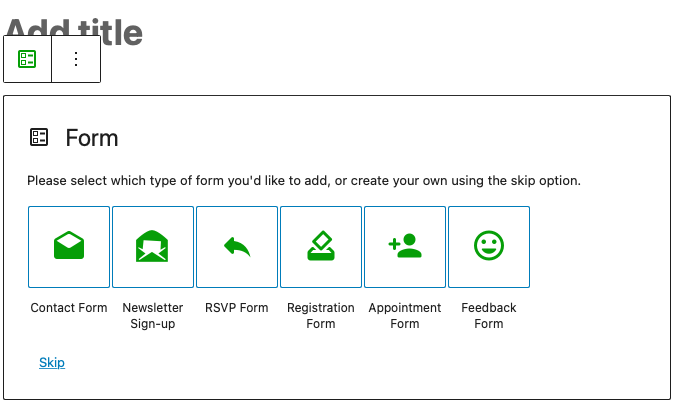
If using the Block Editor, you can add a contact form block by clicking on the (+) symbol and selecting it from the list of available blocks. Scrolling down should take you to the section with Jetpack blocks. Or, you can search for it by name. Click Form when you find it.

From there, you can select the type of form you wish to create, including:
- Contact Form
- Newsletter Sign-up
- RSVP Form
- Registration Form
- Appointment Form
- Feedback Form
3. Configure your contact form settings
Now it’s time to configure your contact form settings. Here, you’ll be able to specify which email address you want the form submissions to be sent to, as well as what you want the subject line of the email to be.
To access these options, open the left-hand side List View and click on “Form”:

Here you can adjust the email address your contact form submissions are sent to, what the email subject line says, and what message someone sees upon submission. You can also choose to send users to a specific URL once they’ve completed their submission.
4. Choose which fields you want to include in your contact form
The default contact form appears as follows:

However, you can make adjustments to this. Jetpack includes a variety of default fields, such as name, email, website, and message.
You can do this by first selecting the form field you’d like to change and then clicking the green icon on the left.

In the above example, we selected the default name field. You can change this (or any) field to whatever you’d like, including:
- Text
- Name
- Website
- Date Picker
- Phone Number
- Message
To make a field required (or optional), click on it, then select the asterisk.

To add a field to your form, click the blue + icon at the top left, scroll down to Jetpack blocks, and select the field type. You can then change the order of the form fields by dragging them.

5. Preview your contact form
Once you’ve configured your settings, it’s a good idea to preview your contact form to make sure everything looks correct. To do this, simply click on the View button at the top of the page.

The next logical step would be to publish your form, but before we discuss that process, let’s first talk about security concerns and some of the more advanced customization options available.